At MARIA TASH, we turn piercing into a luxury experience thanks to world-class piercers, an individualized approach, and unparalleled standards for health and safety.
The Piercing Experience

Placement and Angles

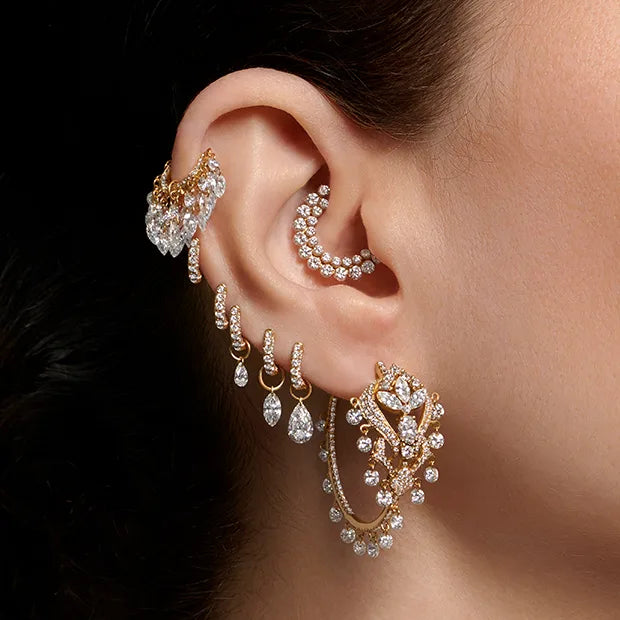
Forward-Facing Piercing
How We Pierce
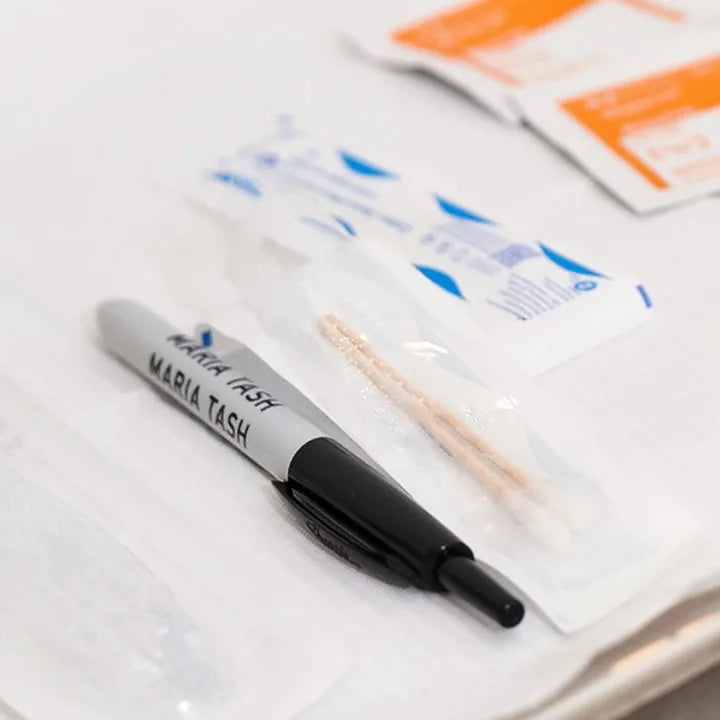
Safety Comes First
When it comes to getting pierced or having jewelry installed, your health and safety are our top priority. Before your appointment, all pieces and tools are sterilized in a Statim autoclave, and every surface in the piercing room is disinfected. Your piercer will wear a mask and apron, and change out gloves during the appointment. After, your piercer will review thorough aftercare instructions. Taking proper care of your piercing is essential so that it heals properly before you begin experimenting with different jewelry.
Piercing Placements & Healing Times
2-4 Months
4-6 Months
6-12 Months
9-12 Months
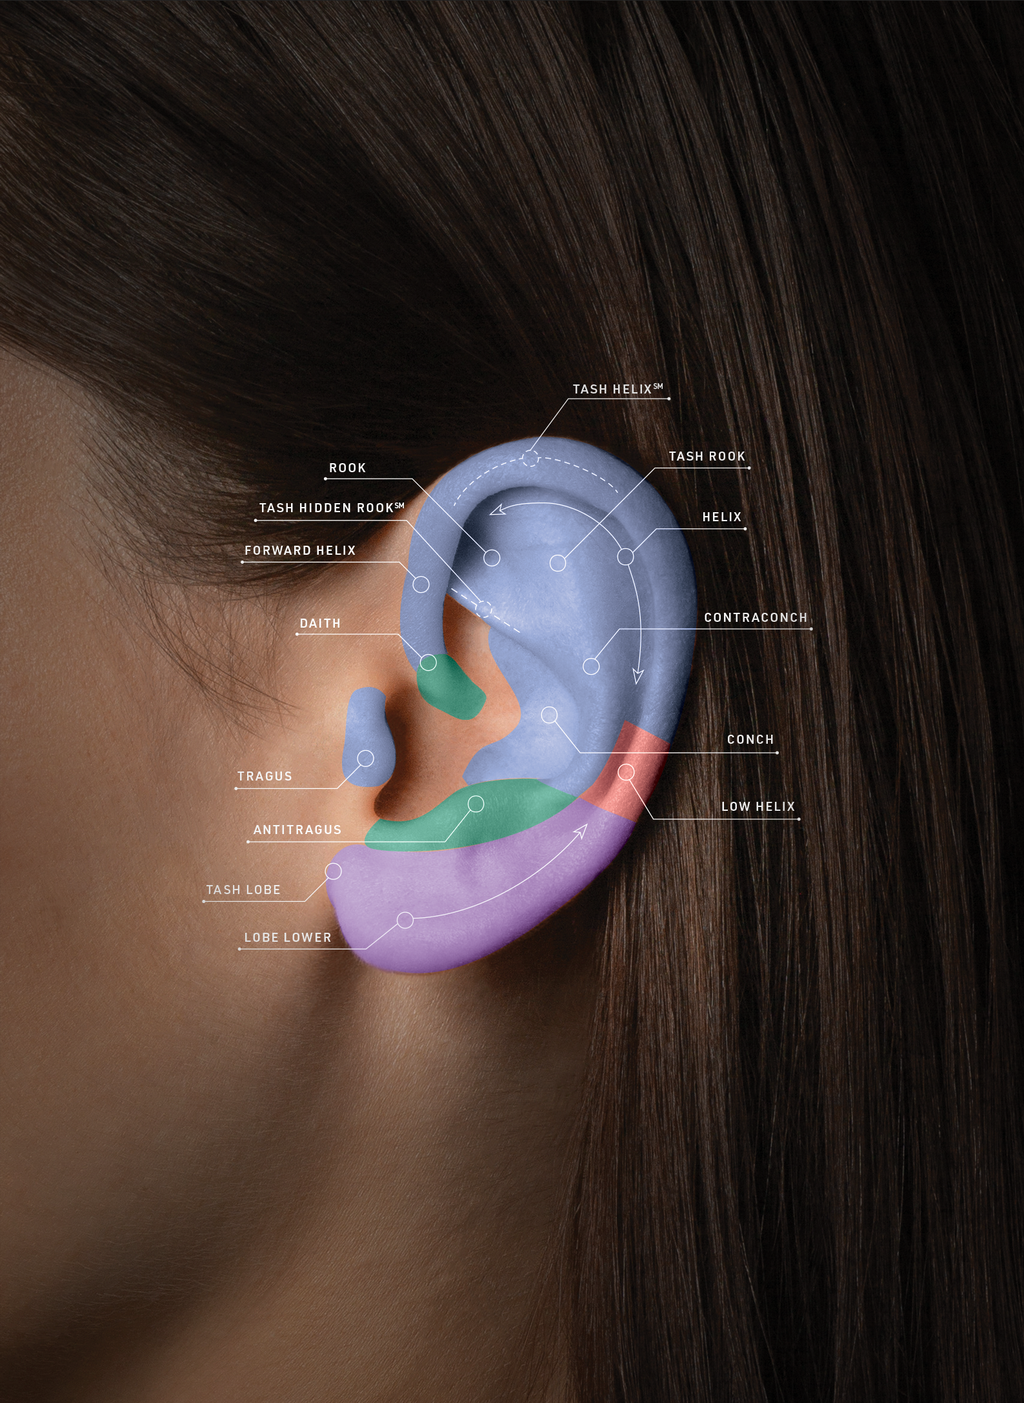
Lobe
The Lobe is the soft lower section of the ear. It is a versatile location to experiment with many different piercings.
Healing Time:
2 - 4 Months
Tragus
The Tragus is the flap of skin that sits in front of the ear canal. Showcase smaller rings and studs in this intriguing placement.
Healing Time:
6 - 12 Months
TASH Lobe
This unique piercing is located at the furthest point on the lower ear, where the Lobe meets the side of the face. Maria perfected this placement so that a range of hoops and studs sits perfectly parallel with the cheek in a forward-facing position.
Healing Time:
2 - 4 Months
Daith
Between the Tragus and Rook, the Daith is positioned in the inner fold of the ear. This bold placement is perfect for showcasing a ring.
Healing Time:
9 - 12 Months
Helix
This placement is located along the inside ridge of the upper ear between the Forward Helix and the Lobe. A wide range of jewelry looks striking in this popular piercing location.
Healing Time:
6 - 12 Months
Rook
A vertical piercing that goes through the ridge of the inner ear closest to the head. Rings and curved barbells are ideal for this placement.
Healing Time:
6 - 12 Months
Conch
The Conch is nestled in the middle part of the inner ear. Loop rings across both the inner and outer ear for a bold look. Alternatively, the area can provide a great frame for studs.
Healing Time:
6 - 12 Months
Forward Helix
Picking up where the Helix leaves off, the Forward Helix is the convex flap of skin that helps connect the ear to the head. Several petite studs make for an interesting curation in this spot.
Healing Time:
6 - 12 Months
TASH Rook
Next to the Rook, the TASH Rook refers to any part of the flat plane of the upper ear above the Contraconch and is named after Maria herself. It makes a great canvas for studs.
Healing Time:
6 - 12 Months
Contraconch
The Contraconch sits on the arched section of the ear between the Conch and Helix. Spotlight smaller studs in this unique placement.
Healing Time:
6 - 12 Months
TASH Helix℠
A hidden placement that sits under the upper ridge at the top of the ear. Jewelry appears to emerge mysteriously from this discrete piercing.
Healing Time:
6 - 12 Months
Antitragus
The Antitragus is the ridge of cartilage above the Lobe and opposite the Tragus. This uncommon placement is the perfect spot for petite hoops and rings.
Healing Time:
9 - 12 Months
TASH Hidden Rook℠
A hidden placement that sits under the rim of the Rook. The entry point and wearable components of our jewelry are tucked under the anatomy to create a “floating” look.